Visual Studio ဖြင့် Build လုပ်ခြင်း
Visual Studio 2017 တွင် CMake support ပါဝင်လာသောကြောင့်၊ ယခုအခါ Visual Studio 2017 ကို အသုံးပြု၍ JSBSim နှင့် အစိတ်အပိုင်းအမျိုးမျိုးကို build လုပ်ရန် နည်းလမ်းနှစ်မျိုး ရှိလာပါသည်။ JSBSim main program၊ Aeromatic++ စသည့် အစိတ်အပိုင်းအမျိုးမျိုးအတွက် standard Visual Studio project file (*.vcxproj) အစုအဝေးတစ်ခုနှင့် project file အမျိုးမျိုးကို ညွှန်းသော solution file (*.sln) တစ်ခု ရှိပါသည်။ အခြားနည်းလမ်းအနေဖြင့် Visual Studio မှတစ်ဆင့် CMake ကို အသုံးပြု၍ JSBSim နှင့် အစိတ်အပိုင်းအမျိုးမျိုးကို build လုပ်ရန် CMake support အသစ်ကို အသုံးပြုနိုင်ပါသည်။
Git ကို အသုံးပြု၍ JSBSim source tree ကို checkout ပြုလုပ်ပါ။ ဤဥပမာများအတွက် source code ကို အောက်ပါနေရာတွင် checkout လုပ်ထားပါသည်-
C:\source\JSBSim
VS 2017 Project File များ အသုံးပြု၍ Build လုပ်ခြင်း
File → Open → Project/Solution … menu option ကို အသုံးပြုပါ။
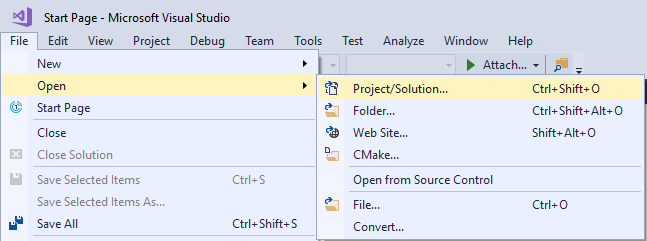
JSBSim source ၏ တည်နေရာသို့ browse လုပ်ပြီး source code tree ၏ root တွင် ရှိသော JSBSim.sln ကို ရွေးချယ်ပါ၊ ဤဥပမာတွင်-
C:\source\JSBSim\JSBSim.sln
Project file များကို compiler နှင့် linker ၏ intermediate file များနှင့် နောက်ဆုံး output file များကို JSBSim ၏ source code tree ၏ အပြင်ဘက်ရှိ directory တစ်ခု၊ ဆိုလိုသည်မှာ C:\source\JSBSim\src ၏ အပြင်ဘက်တွင် သိမ်းဆည်းရန် config လုပ်ထားပါသည်။

ထို့ကြောင့် ဥပမာအားဖြင့် JSBSim နှင့် Aeromatic အတွက် intermediate file များကို အောက်ပါ directory များတွင် သိမ်းဆည်းပါမည်-
C:\source\JSBSim\Debug\x64\JSBSim
C:\source\JSBSim\Debug\x64\aeromatic
Output file များကို အောက်ပါနေရာတွင် တွေ့ရှိနိုင်ပါသည်-
C:\source\JSBSim\Debug
VS 2017 CMake Support ကို အသုံးပြု၍ Build လုပ်ခြင်း
File → Open → CMake … menu option ကို အသုံးပြုပါ။
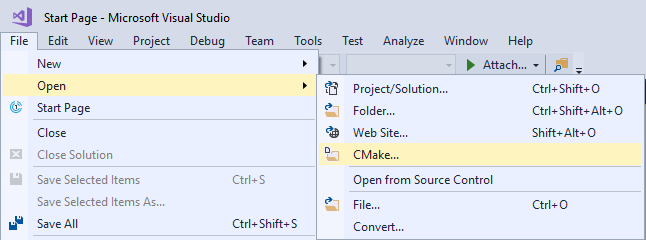
JSBSim source ၏ တည်နေရာသို့ browse လုပ်ပြီး source code tree ၏ root တွင် ရှိသော CMakeLists.txt ကို ရွေးချယ်ပါ၊ ဤဥပမာတွင်-
C:\source\JSBSim\CMakeLists.txt
Build configuration စုစုပေါင်း ၄ ခု ရှိပါသည်၊ x86၊ x64 နှင့် တစ်ခုစီအတွက် Debug၊ Release version များ ဖြစ်ပါသည်။ Build လုပ်လိုသော build configuration ကို ရွေးချယ်ပါ။
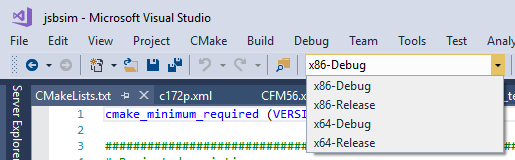
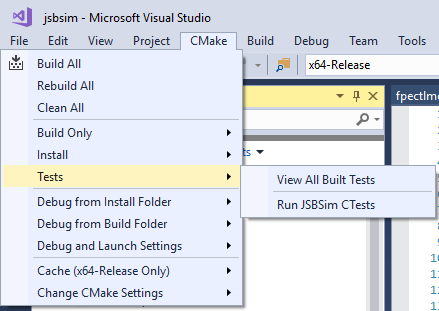
ထို့နောက် မည်သည့်အစိတ်အပိုင်းများကို build လုပ်လိုသည်ကို ဆုံးဖြတ်ရန် CMake menu option ကို အသုံးပြုပါ။
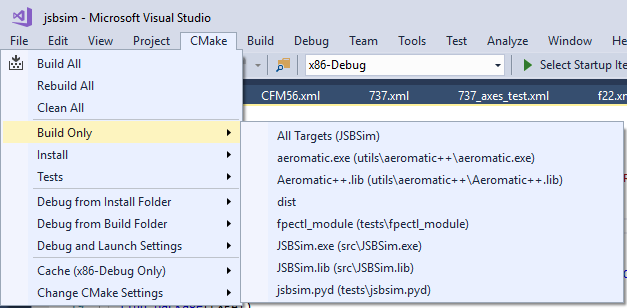
Default အနေဖြင့် Visual Studio သည် CMake ကို source tree ၏ အပြင်ဘက်တွင် build လုပ်ရန် configure လုပ်ထားပြီး၊ default အနေဖြင့် user ၏ home directory ရှိ build directory တစ်ခုကို အသုံးပြုကာ directory path ၏ တစ်စိတ်တစ်ပိုင်းအဖြစ် GUID (Globally Unique ID) ကို အသုံးပြုပါသည်။ Visual Studio ၏ Output window တွင် ထွက်ပေါ်လာသော path ကို တွေ့ရပါလိမ့်မည်၊ ဥပမာ-
Working directory: C:\Users\Sean\CMakeBuilds\3f00c6d9-d323-5a32-8a90-665138817fd4\build\x64-Release
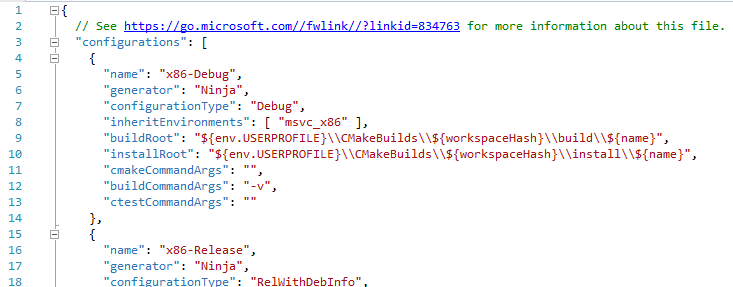
ဥပမာအားဖြင့် သင့် CMake build များအတွက် home directory ကို အသုံးမပြုလိုပါက၊ CMake → Change CMake Settings menu option ကို အသုံးပြု၍ CMakeSettings.json file တစ်ခု ထုတ်ပေးနိုင်ပြီး ထို့နောက် buildRoot နှင့် installRoot property များကို ပြင်ဆင်နိုင်ပါသည်။
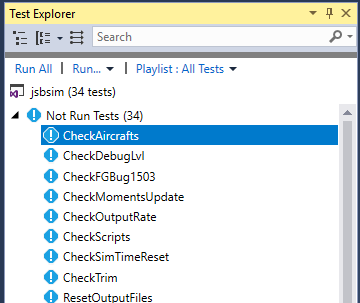
နောက်ဆုံးအနေဖြင့် Visual Studio သည် JSBSim test များကို run ခြင်းကိုလည်း ပံ့ပိုးပေးပါသည်။